Tangent Map
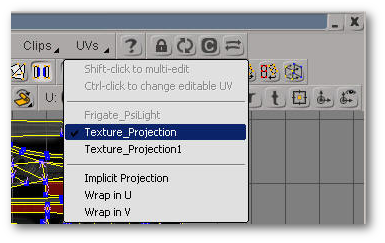
Repeat step 1 of Creating the UV Map. This will create a second set of UVs from which to base the Tangent Map on.
Press [Alt + 7] to access the Texture Editor.
From the UVs menu of the Texture Editor Menu Bar, select the original set of UVs that you created, which is the first one listed. By default, they are named “Texture_Projection,” “Texture_Projection1,” “Texture_Projection2,” etc. by order of creation.
Press [Ctrl + A] to select all the vertices on the UV Map.
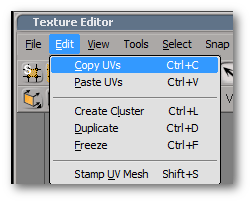
From the Menu Bar, go Edit --> Copy UVs or [Ctrl + C].
Go back to the UV menu and select the second UV set (in this case “Texture_Projection1”). This will switch you to the second set.
Go Edit > Paste UVs or [Ctrl + V]. Your second set of UVs is now an exact copy of the original set of UVs.
Note: You might need to switch to the first UV set and then switch back to the second set to view this change.
Close the UV Editor and go back to the main XSI program window.
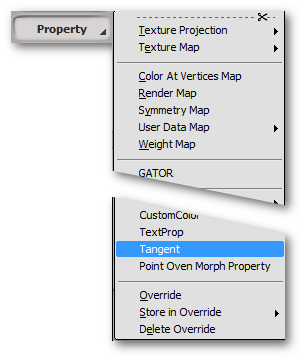
With the mesh selected, under the “Get” section of the Model/Animate/Render/Simulate Toolbar, go Property --> Tangent.
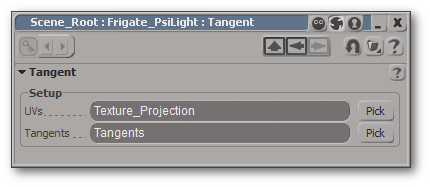
From the Tangent property editor that appears, click the “Pick” button located to the right of the entry for “UVs” property. Your mouse pointer should be transformed into a black arrowhead with the word “PICK” next to it. You are now in a “Pick Session”.
While in this Pick Session, click on the “Selection” button within the Select Panel on the right side of the program window.
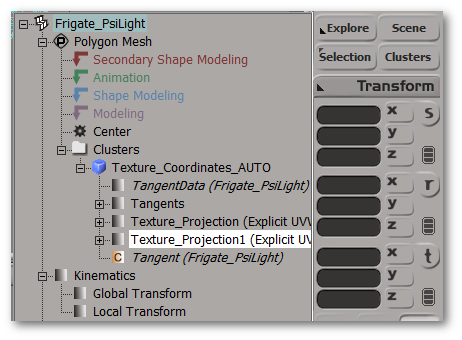
Navigate to and click on Polygon Mesh --> Clusters --> Texture_Coordinates_AUTO --> Texture_Projection1.
This should associate the Tangent Map to the second UV set.
Note: If your UVs were not created in XSI, the directory structure might be named differently. Double click to bring up the properties window and rename to Texture_Coordinates_AUTO
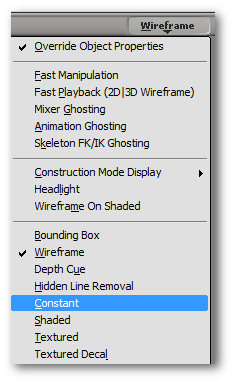
To best view the Tangent RGB, your display type has to be either “Hidden Line Removal,” “Constant,” or “Shaded”
If you are still unable to see the Tangent RGB colors, check if it is enabled by going into the Viewport Display Type menu and selecting “Display Options...” (Fig. 1d-6, 2nd menu item from bottom). From the Display Options editor, under the “Shaded Mode” section, in the entry for “Vertex Color” property, make sure “Show RGB Color” is selected in the drop-down list.
Use the Texture Editor (Alt + 7) to edit the Tangent Map as you see fit.
Note: In terms of UV Layout, the Tangent Map does not particularly care about location or scale of components. Orientation and level of relaxation is generally more important in determining how the RGB values blend into each other.
Changing the smoothing value of the Tangent Map:
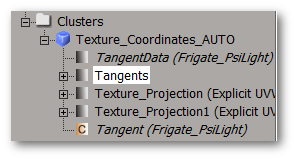
a) With the mesh selected, click the “Selection” button in the Select Panel.
b) Navigate to and double-click Polygon Mesh --> Clusters --> Texture_Coordinates_AUTO --> Tangents. The Tangent Operator property editor should appear.
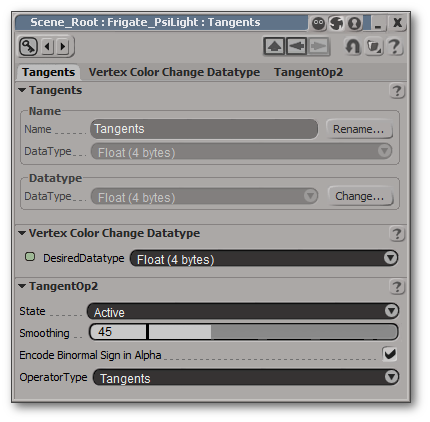
Note: This is not the same as the Tangent property editor.
c) Under the “TangentOp2” section, play around with the “Smoothing” value until you get one that best suits the model..
Freezing
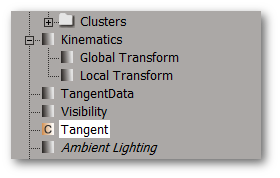
Editing Tangent UVs usually heavily bogs down system resources. Click on the “Freeze” button periodically to delete the modeling history to compensate. However, freezing the model locks the Smoothing value and the severs the Tangent Map’s dependence on the Tangent UV layout. To go back to having the Tangent Map update as you edit the Tangent UVs, do the following:
Note: Step 17 also resets the Smoothing value, so every time it is performed, step 16 would have to be performed again afterwards.
a) Select your model.
b) Click the Selection button from the Select Panel.
c) Double-click the item named “Tangent” to the right of the orange square with a “C”.
d) The Tangent property editor should pop-up. This indicates that proper updating of the Tangent RGB colors on the model is now enabled.
Once you are satisfied with the Tangent Map, freeze the model.