Hooking-up the Textures
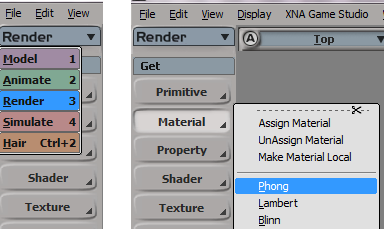
1) Select your model, Press the “3” key and from the Model/Animate/Render Toolbar, go
Material --> Phong
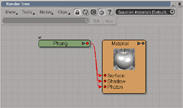
2) With the mesh still selected, press the “7” key (not on the key pad).
This should bring up the Render Tree showing a Phong Node connected to the Material of the selected object.
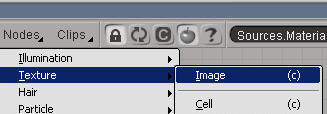
3) In the Menu Bar of the Render Tree go Nodes --> Texture --> Image.
This should create a new unconnected Image node.
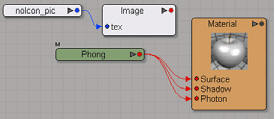
4) Double-click on the new Image node that was just created. The Image node’s property edit box should pop-up.
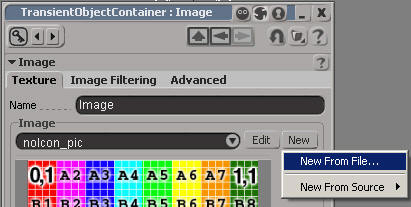
5) Under the “Image” section of the “Texture” tab, click New --> “New From File...” then navigate to your texture file.

This will create a file node labelled with the texture name--in the example case “FrigatePsiLight-nm_dds”—that is hooked-up (connected by a blue arrow) to the image node .
NOTE: Alternatively, you could just drag the texture files from Windows Explorer onto the Render Tree and manually hook-up the texture file to the image node by clicking and holding the mouse button on the blue dot of the file node and dragging your mouse onto the image node, then releasing the mouse button, and selecting “tex” from the context menu that pops-up.
6) Repeat steps 3 to 5 until you have connected each of the -cl, -da, and -nm textures to an image node.

7) Hooking-up the image nodes to the Phong node...
a) Click and hold down the mouse button on the red dot on the Image node. A red arrowhead should then appear where your pointer is.
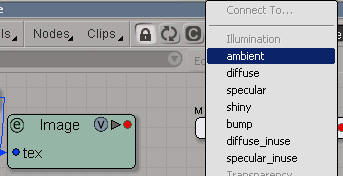
b) Drag your mouse over to the Phong node and release. A context menu should pop-up listing all the Phong properties you are allowed to connect the image node to.
c) Image Node Connections: Table shows which Phong property to connect each texture image to.
| Map Type | Phong Property to Hook-up to | *.Mesh Equivalent |
| Normal Map (-nm) | ambient | Normal |
| Color Map (-cl) | diffuse | Diffuse |
| Data Map (-da) | specular | Self-Illumination |

8) Your final material set-up should look similar to this.
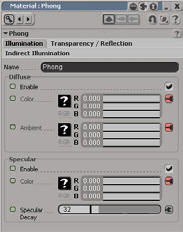
9) The “Glossiness” parameter in the *.mesh file corresponds to the “Specular Decay” property of a phong material. To access this property, just double-click on the Phong node in the Render Tree and the Phong property edit box should pop-up. The example case has a value of 32.


10) To be able to view the texture on the model you have to be in either “Textured” display or “Texture Decal” display. Switch to either of these display types from the View Port Display Type menu.
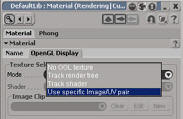
11) Changing the default texture used by the model in the view ports:
a) Double-click the top-level node of the Material (in this case the node that happens to be labelled “Material”)
b) Switch from the “Name” tab to the “OpenGL Display” tab.
c) Under the “Texture Selection” section, change the entry for “Mode” property to “Use specific Image/UV pair”. This should then enable the “Image Clip” entry box.
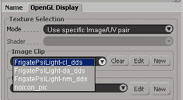
d) From the drop-down list of the Image Clip entry box, select your preferred image. The model should now have switched to the preferred image texture.