2nd Set Materials
A model can have multiple materials applied to it, that is, it can reference two or more sets of color, data, and normal maps. This can be accomplished by setting up what’s called a “cluster” for each portion of the model that references a different set of texture maps.
1) Select your model.
2) Press the U key. The wire frame should have turned yellow. You are now in Raycast Polygon Selection Mode.
3) Select all the polygons that you want to apply a different material to. You can select polygons by left-clicking and “painting” across the surface of the object. You can add polygons to your selection by Shift + LMB and subtract polygons by Ctrl + LMB.

4) On the Edit Panel click on the “Cluster” button.
Note: This Button is context-sensitive and only appears if you are in Component Selection Mode and you have component(s) selected.

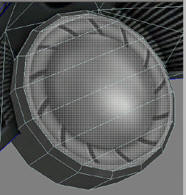
5) You have now created a cluster and the property editor for that cluster should have popped-up. XSI would have called this cluster “Polygon” by default. In addition, instead of the red selection shading on the polygons selected, XSI would have replaced the shading with a greyish-white color representing the cluster selection.

6) With the cluster still selected, press 8 to call-up the Explorer window. While staying within Explorer, hit the F key to frame/ navigate to the selection--in this case the cluster. If you ever need to select the cluster this would be where it is. The path would be [Mesh_Name] --> Polygon Mesh --> Cluster --> [Cluster_ Name].

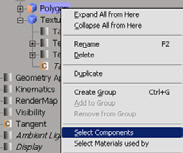
Note: Also, if you ever need to select the polygons that make up the cluster, simply right-click the cluster in explorer and select “Select Components” from the context menu that pops-up.
7) With the cluster still selected, press Alt+7 to call up the UV Editor. Notice that the only UVs visible are those of the cluster. Edit the UVs as you see fit.
8) To apply a different set of materials to this cluster, have the cluster selected and repeat Hooking up textures to the model.
9) Use the Explorer Window (SceneRoot View + Material View + Sources View) and the Render Tree to organize the different materials.
10) Don’t Forget to Freeze and Clean-up your scene!